Monday, May 30, 2016

IBM WCS Infocentre important urls


Order flow :

https://www.ibm.com/support/knowledgecenter/SSZLC2_7.0.0/com.ibm.commerce.developer.doc/refs/rosshopflowdiag.htm

Dataload Sample csv :

https://www.ibm.com/support/knowledgecenter/SSZLC2_7.0.0/com.ibm.commerce.management-center.doc/refs/rpncatloaditems.htm?lang=en

Dataload BOD and Webservice :

http://www.ibm.com/support/knowledgecenter/SSZLC2_7.0.0/com.ibm.commerce.services.doc/plugin-gentopic1.htm?lang=en


Thursday, May 26, 2016

GIT - SSL certificate problem: unable to get local issuer certificate

While doing clone to your hosted GIT server repository sometime you can face SSL certificate problem. By turning off SSL verification you can over come this issue.

Issue:

$ git clone https://test@bitbucket.org/test/test.git
Cloning into 'test'...
fatal: unable to access 'https://test@bitbucket.org/test/test.git/': SSL certificate problem: unable to get local issuer certificate


Solution : 


Turn off Git SSL Verification
You can stop the Git client from verifying your servers certificate and to trust all SSL certificates you use with the Git client. This has it’s own security risks as you would not be warned if there was a valid problem with the server you are trying to connect to.

That said, it’s the quickest and easiest fix for a non trusted server certificate. Simply run the below git command on your Git client.


Run - git config --global http.sslVerify false


If you are under proxy : Use below command:

git config --global http.proxy http://<User Name>:<Password>@proxy.net.com:8080

<User name> --> Give user name
<Password> --> Use password 
NOTE : If your password have any special charecter make sure you use encoded value for that.

Get encoded value --> https://en.wikipedia.org/wiki/UTF-8

e.g. if you have & in password use %26


Friday, March 4, 2016

User registration and post registration flow

UserRegistrationAdd flow
  • Calls an empty task command called PreUserRegistrationAddCmd. The responseProperties contains the new userId and addressId parameters. Store Developers can override the command to perform more operations.
  • Updates the record of the current guest customer in the USERS table and changes the registration type from 'G' (guest) to 'R' (registered) and populates the DN.
  • Creates a record in the USERREG table. If the authentication mode is LDAP, the logonId field in the USERREG table stores the DN of the user. The logon password is only stored on the LDAP server, not in the USERREG table. The user's position in the membership hierarchy is stored in MBRREL table.
  • If one or more fields that are related to the USERPROF, BUSPROF or USERDEMO tables are specified, a new record is created in these tables; otherwise, no record is created.
  • A self address (also called a registration address, with the selfAddress field set to '1' and the nickname the same as the logonId) is created. Each user can have only one self address. To find the selfAddress, use the AddressAccessBean.findSelfAddressByMember(Long memberID).
  • If the logonPassword is changed, the URL calls the AuthenticationPolicyCmd task command to verify or update a user's credentials.
  • Calls the ProcessParentMemberCmd task command to validate the parentMember. If the parentMember is null, the default parent is the Default Organization (that is, the orgEntityId = -2000). If the parentMember is not null, it can take two different types of values:
    • Encrypted orgEntityId (that is, using "wcs_encrypt -e orgentityId")
    • DN of the organization or organizational unit (such as "o=Default Organization or o=Root Organization").
  • Calls the ProcessProfileTypeCmd task command to determine and validate the profileType. If the profileType is not specified, and the parentMember is not specified or if it is the Default Organization, by default, the profileType is set to 'C' and a B2C user is created. If the profileType is not specified and the parentMember is not the Default Organization, by default, the profiletype is set to 'B' and a B2B user is created.
  • Calls the AuthenticationPolicyCmd task command to verify or update a user's credentials.
  • If preferredCurrency is not specified, the default is the preferred currency in command context.
  • If a new address needs to be created but the addressType is not specified, the default is 'SB' (shipping and billing address).
  • Checks the required registration information parameters.
  • Calls the AuditUserRegistrationCmd task command to check more parameters. Store Developers need to add new code to the AuditUserRegistrationCmd task command if they want to customize the check.
  • Calls the SetCurrencyPrefCmd task command to set preferred currency to command context.
  • Calls the UserRegistrationRoleAssignCmd task command to assign roles during self-registration. This command requires customization needs to be overridden by a Store Developer to enable role assignment during self-registration.
  • If the authentication mode is 'LDAP', a user entry is created on the LDAP server.
  • Calls an empty task command called PostUserRegistrationAddCmd. Store Developers can overwrite it to perform more operations.
  • If the command fails, the UserRegistrationErrorView view command is called. Upon successful completion, the specified URL is called.
  • Reads the MemberRegistrationAttributes.xml file. Specifically, it reads the <UserRoles> element and applies the roles that have a qualifier of registrationQualifier="UserRegistration".
  • Applies the roles that have the qualifier 'UserRegistration'. The MemberRegistrationAttributes.xml file lists the default roles that the customer plays (for example, a registered customer in the store to which they are registering). The Site Administrator can configure this file to assign roles that are based on the organization to which the user registers and the store from which they are registering. More roles can be applied using the Organization Administration Console.
Note: WebSphere Commerce does not support the concurrent login of two or more users that log in using the same user ID. For example, consider the scenario where two users at a company regularly share an account at a store. Suppose that the first user is on the store's payment page, and just before the user submits their order, the second user logs in. The following is what takes place:
  1. Browser one ... User 1 logs in as user "xyz"; adds an item to the shopping cart.
  2. Browser two ... User 2 logs in as user "xyz" as well, and goes to the shopping cart page and then proceeds to checkout.
  3. Browser one ... User 1 clicks checkout, but is informed that they are logged off.
  4. Browser two ... User 2 completes the checkout, as normal.
Another scenario is when businesses use a common user ID for their employees to shop at a B2B store. Only one user should use the common user ID at a time, or each user should be set up with their own user ID. Otherwise, one of the users are likely unable to complete their transaction.
You can enable multiple logon support to allow for the same authenticated user to use the site from multiple browsers or locations. By enabling this support, two or more users can log on using the same user ID.

UserRegistrationUpdate flow

  • Note that the parent member and the profile type of the user cannot be changed.
  • Calls an empty task command called PreUserRegistrationUpdateCmd. Store Developers can overwrite it to change the input to the command.
  • Updates the record of the current registered user in the USERS table.
  • If the authentication mode is 'LDAP', a user information may also be updated on the LDAP server.
  • If the authentication mode is 'LDAP', the logonId cannot be changed.
  • If one or more fields related to the USERPROF, BUSPROF or USERDEMO tables are specified, updates each of these tables. If there is no record, creates a new record in these tables.
  • If one or more fields related to the ADDRESS table are specified, the self address (also called the registration address, with the selfAddress field set to '1') will also be updated. The old address will be marked as 'T' (temporary) and a new record will be created in the ADDRESS table. If this user does not have self address, a new self address will be created.If the logonPassword has been changed, calls the AuthenticationPolicyCmd task command to verify or update a user's credentials.
  • Checks required registration information parameters.
  • Calls the AuditUserRegistrationCmd task command to check additional parameters. Store Developers need to add new code to the AuditUserRegistrationCmd task command if they want to customize the check.
  • Calls the SetCurrencyPrefCmd task command to set preferred currency to command context.
  • When LDAP is used, the user is created in both the database and on the LDAP server. The authentication information is stored only in database, but all other information is replicated back to the database.
  • Calls an empty task command called PostUserRegistrationUpdateCmd. Store Developers can overwrite it to perform additional operations.
  • If the command fails, the UserRegistrationErrorView view command is called. Upon successful completion, the specified URL is called.
  • When the user is created using this command, the system assigns roles based on the MemberRegistrationAttributes.xml file. When choosing the roles to assign, the system uses the following information: the RegistrationType of 'UserRegistration', the member ancestor tree for the user, and the store to which the user is registering.


Tuesday, February 16, 2016

Disable the access control policy

How to disable the access control policy:
1. Open wc-server.xml which is located in WCDE_ENT70\workspace\WC\xml\config\wc-server.xml
 2. Search for "<Instance" tag
 3. Add AccessControlUnitTest="true immediately after "<Instance "
 4. Save the file
 5. Restart the server

 After implementing this steps the server will not throw  "User does not have authority to execute Command/View"
How to disable access control check in Commands:
 If you want to disable access control policy for a controller command then call setAccCheck(false) before calling execute.
 This method is set by the web controller to indicate whether an access control check is required for this command.

 For e.g
 OrderCreateCmd orderCreateCmd=
 (OrderCreateCmd ) CommandFactory.createCommand(OrderCreateCmd .NAME,   getStoreId())    
 orderCreateCmd.setAccCheck(false);
 orderCreateCmd.execute();

accessControlCheck():

 This method performs a command level access control check for this command. The default implementation invokes the access control manager to perform the check.This method returns true
 if the user has authority and false otherwise.


getResources()
 This method is used to implement resource-level access control. It returns a vector of resource-action pairs upon which the command intends to act. If nothing is returned, no resource-level access control is performed.In order to Skip Resource level Access  control in a Controller Command do as below. But it is not recommended.
 public AccessVector getResources() {
 return null;
 }
checkIsAllowed()

 This method determines whether a user can perform a specified action on a certain resource. This method is called by the command to perform a resource level access control check in addition to the resources returned by the getResources() method.

Friday, January 22, 2016

Rule based sales categories in ibm wcs

You can create and use rule-based sales categories in a sales catalog to help you create sales categories quickly and more efficiently. Rule-based sales categories are a type of sales category that uses a search-based, user-defined rule with WebSphere Commerce search to find and automatically assign catalog entries to the category. By using rule-based sales categories, such as for large categories or frequently changing categories, you can reduce the time that is needed to assign or update the catalog entries for the category.
Enabling rule-based sales categories

Procedure

1.       Go to the following directory and open your custom wc-admin-component.xml catalog component configuration file for editing:

WCDE_installdir\xml\config\com.ibm.commerce.catalog-ext

Note: If the custom com.ibm.commerce.catalog-ext directory and wc-admin-component.xml file does not exist for your site, you must create the directory and file

2.       Go to the following directory and open the default wc-admin-component.xml catalog features component configuration file:

WCDE_installdir\xml\config\com.ibm.commerce.catalog-fep

The wc-admin-component.xml file in this directory includes configuration properties that you set to change the behavior of catalog-related features. The RuleBasedCategoryConfiguration configuration grouping in this file includes the configurable properties that are specific to rule-based sales categories.

3.       Copy the following RuleBasedCategoryConfiguration configuration grouping from the default wc-admin-component.xml configuration file into the corresponding location in your custom wc-admin-component.xml configuration file.

<_config:configgrouping name="RuleBasedCategoryConfiguration">
  <_config:property name="evaluationEnabled" value="false"/>
  <_config:property name="evaluationHostname" value="" />  
  <_config:property name="evaluationTimeInterval" value="-1" />
</_config:configgrouping>

4.       In your custom wc-admin-component.xml configuration file, enable the evaluationEnabled configurable property by setting the value for the property to "true". This property indicates whether the rules for rule-based categories can be applied to the categories. This setting applies for all rule-based sales categories in the system. When the rule is applied to a category, WebSphere Commerce search uses the rule to find catalog entries that match the search filters in the rule. The catalog services then assign the catalog entries to the category. The resulting relationships between the catalog entries and the category are stored in the CATGPENREL database table.
Note: You can reset the enablement configuration setting and other rule-based sales category configuration settings by changing the values for the properties and refreshing the RuleBasedCategoryConfiguration registry in the WebSphere Commerce administration console.

If your custom wc-admin-component.xml file includes only the RuleBasedCategoryConfiguration grouping, the contents of your file can look like the following file:

<_config:DeploymentConfiguration xmlns:_config=http://www.ibm.com/xmlns/prod/commerce/foundation/config  xmlns:xsi="http://www.w3.org/2001/XMLSchema-instance" xsi:schemaLocation="http://www.ibm.com/xmlns/prod/commerce/foundation/config ../xsd/wc-admin-component.xsd">
<_config:extendedconfiguration>
<_config:configgrouping name="RuleBasedCategoryConfiguration">
  <_config:property name="evaluationEnabled" value="true" />
<_config:property name="evaluationHostname" value="" />              

 <_config:property name="evaluationTimeInterval" value="-1" />
</_config:configgrouping>
</_config:extendedconfiguration>
</_config:DeploymentConfiguration>

Optional: Configure the properties that control the use of a EvaluateRuleBasedCategories job for automatically reapplying rule-based sales category rules. By configuring these properties, the rule evaluation and application job can run automatically after a configured amount of time elapses from the last time that the rule was evaluated.In your custom wc-admin-component.xml configuration file, set a value for the evaluationHostname configurable property. This property ensures that the EvaluateRuleBasedCategories job runs on only a single node. Consider setting a value for this property to isolate the process for finding and assigning catalog entries to rule-based sales categories from other processes.
Set the value for this evaluationHostname property to be the hostname for the server that you want the EvaluateRuleBasedCategories job to run on.

Set a value for the evaluationTimeInterval configurable property to be a positive value. This value is the time interval in seconds that elapses before the job runs to reapply the rule for a category. The default value for this property is "-1", which indicates that the evaluation job is to never run.
When the time interval elapses, the EvaluateRuleBasedCategories job runs to reapply the rule to a category. This interval is measured independently for each rule-based category from the time that the rule was last applied.
Save and close the file.
Now create rule based category from MC
1.    Create a rule-based sales category as follow:
To create a category in a sales catalog: On the explorer view, right-click a sales catalog or sales category. Click New Rule-Based Sales Category


2. Defining the rule for assigning catalog entries to a rule-based sales category : Now go to rule

tab, Following options are available

Expand the Search conditions for finding catalog entries to automatically assign to this category section. Specify one or more of the following search conditions for the rule to use to find and assign catalog entries to the category. These catalog entries are combined with any specific catalog entries that you assign to the category.

a. Catalog entry properties: You can use any of the following types of properties:

· Code
· Manufacturer Name
· Manufacturer Part Number
· Name
· Short Description
To use other catalog entry properties, an IT developer must customize the target to include the properties as search filters.

b. Categories
You can use master categories and sales categories. When you include a category, the category and all of its child categories are searched for catalog entries that match the search filter conditions.

c. Attribute dictionary attributes
If you want to use an attribute dictionary attribute, the attribute must be enabled for use in merchandising.
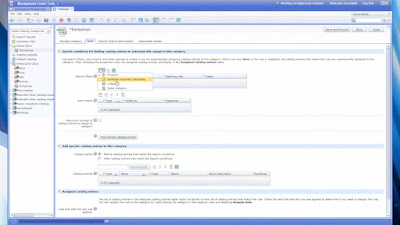
In below example we are using Attribute


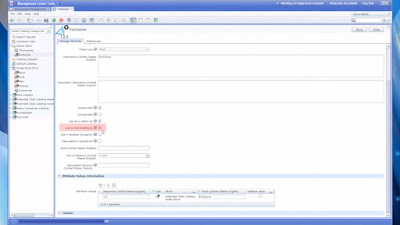
3. Make Sure “Use in the merchandising is checked for using this feature


4.Under reference section you can see all product having particular attribute.


5. Under rule tabyou can create short criteria aswell.


Wednesday, January 20, 2016

Integrate WebSphere Commerce and Pinterest

Why integrate IBM WebSphere Commerce and Pinterest

IBM WebSphere Commerce
IBM WebSphere Commerce (WC) provides an e-commerce platform that delivers seamless and consistent omni-channel shopping experiences, including mobile, social, and in-store shopping experiences. WebSphere Commerce engages your customers with immersive brand experiences through contextually relevant content, marketing. and promotions while extending your brand across customer touch points.

Pinterest
Pinterest has introduced Buyable Pins to their mobile application.  When a pinned item in the Pinterest app shows a blue price, you will also see a blue Buy It button, indicating that the item can be purchased from the retailer, directly via the Pinterest app – no need to pause your pinning activities to bounce out to the retailer’s web site! 

Business Value
Your marketing team recognizes the power of social media, and knows that many of the people browsing Pinterest have the intention of shopping for the items they see and love.   If you are using WC as your eCommerce platform, you can use this asset to accelerate the integration of Pinterest Buyable Pins with your own WC environment.


Monday, January 18, 2016

jQuery Selector

jQuery Selector

#No     Syntax                              Description
---------------------------------------------------------------------------------------
1.      $(this)                             Current HTML element
2.      $(".intro")                         All elements with class="intro"
3.      $("#intro")                         The first element with id="intro"
4.      $("p")                              All <p> elements
5.      $("p.intro")                        All <p> elements with class="intro"
6.      $("p#intro")                        All <p> elements with id="intro"
7.      $("p#intro:first-child")            The first <p> element with id="intro"
8.      $("ul li:first-child")              The first <li> element of each <ul>
9.      $("ul li:last-child")               The last <li> element of each <ul>
10.     $("ul li:nth-child(4)")             The fourth <li> element of each <ul>
11.     $("div#intro .head")                All elements with class="head" and id="intro" of DIV
12.     $("[href*='User']")                 All elements with href contains "User"
13.     $("[href^='User']")                 All elements with href start with "User"
14.     $("[href$='.html']")                All elements with an href attribute
                                            that ends with ".html"
15.     $("[href*='User'] div")             AND condition for Getting all element
                                            which have href contains "User" and inner element div
16.     $("[href*='User'],div")             OR condition for Getting all element
                                            which have href contains "User" or div element
17.     $("[href!='UserInfo.html']")        NOT condition for Getting all element  
                                            which have href not equle to "UserInfo.html"
18.     $("div > input#User")               Getting all element which have a parent element is
                                            DIV and next element is INPUT have a id User
19.     $("div").find("input#User")         Getting all element of parent element is
                                            DIV and child element is INPUT have a id User
20.     $("div").not(".UserInfo, #UserId")  Getting all div element which not have a

                                            class USERINFO or id is USERID